
A great way to extend Archimatix is to create your own node to work with other nodes in the graph. While you can create your own node by saving a graph you create to the Library or by creating a custom parametric Shape using AX Turtle scripting, you have the most power and flexibility to change the course of AX history by coding a node in c#.
Fortunately, its not that hard to create a node. All you have to do is derive a class from one of AX’s Generator classes. Most commonly, you will subclass Generator2D or Generator3D. You only need to override a couple of functions and, voila, you have created a custom node.
Location, Location, Location
Your script file and icon file can be anywhere in the project’s Asset folder your new node will be discoverable by AX. The only requirement for discoverability of your class is that, in addition to subclassing a Generator, you need to implement the interface ICustomNode. AX uses this Interface to search for custom node classes.
While your node icon can be anywhere in the Asset folder, it will be discoverable only if you name the icon image file according to the convention zz_AXNode-MyNodeName.jpg and place it anywhere in the Asset folder, your node will appear in the right sidebar menu of the node graph window, toward the bottom of the menu.
Making your Node Iconic
 If you don’t create your own node icon image, one will be automatically displayed for you in the right sidebar of the node graph. AS a generic icon, the only way a user will know that it creates an instance of your node is by the tool tip that appears when you mouse over it. For this reason, it is probably best to create your own distinctive look!
Your node icon image should be square and saved as a jpg file. If you have named your image file according to the convention above, then it will be displayed in the sidebar at 64×64 pixels so your original image file should be that size or larger. In order to work contextually with the other nodes in the sidebar color-wise, you can use the blank image icon to the right as a background. Once your image is saved, select it in your Unity Project window and, in the Inspector, set the Texture Type to Editor GUI.
Its All What You Node
A custom node written in C# is really just a subclass of a AX.Generator. A Generator has inputs, parameters, generative logic and outputs. The inputs may be Shapes, Meshes, Prefabs, or the output of any AX node. You can determine what output parameters you would like to provide for.
A Generator gives a node a behavior. The actual node class itself is AXParametricObject, which subclasses AXNode. Before going too deeply into the structure of AX, lets look at an example of what a Generator subclass might look like.
To get started, duplicate Archimatix/Scripts/Core/Generators/CustomNodeTemplate.cs. Change the node name, and edit the generate function and you have your own node!
Custom Zones in the Node Palette
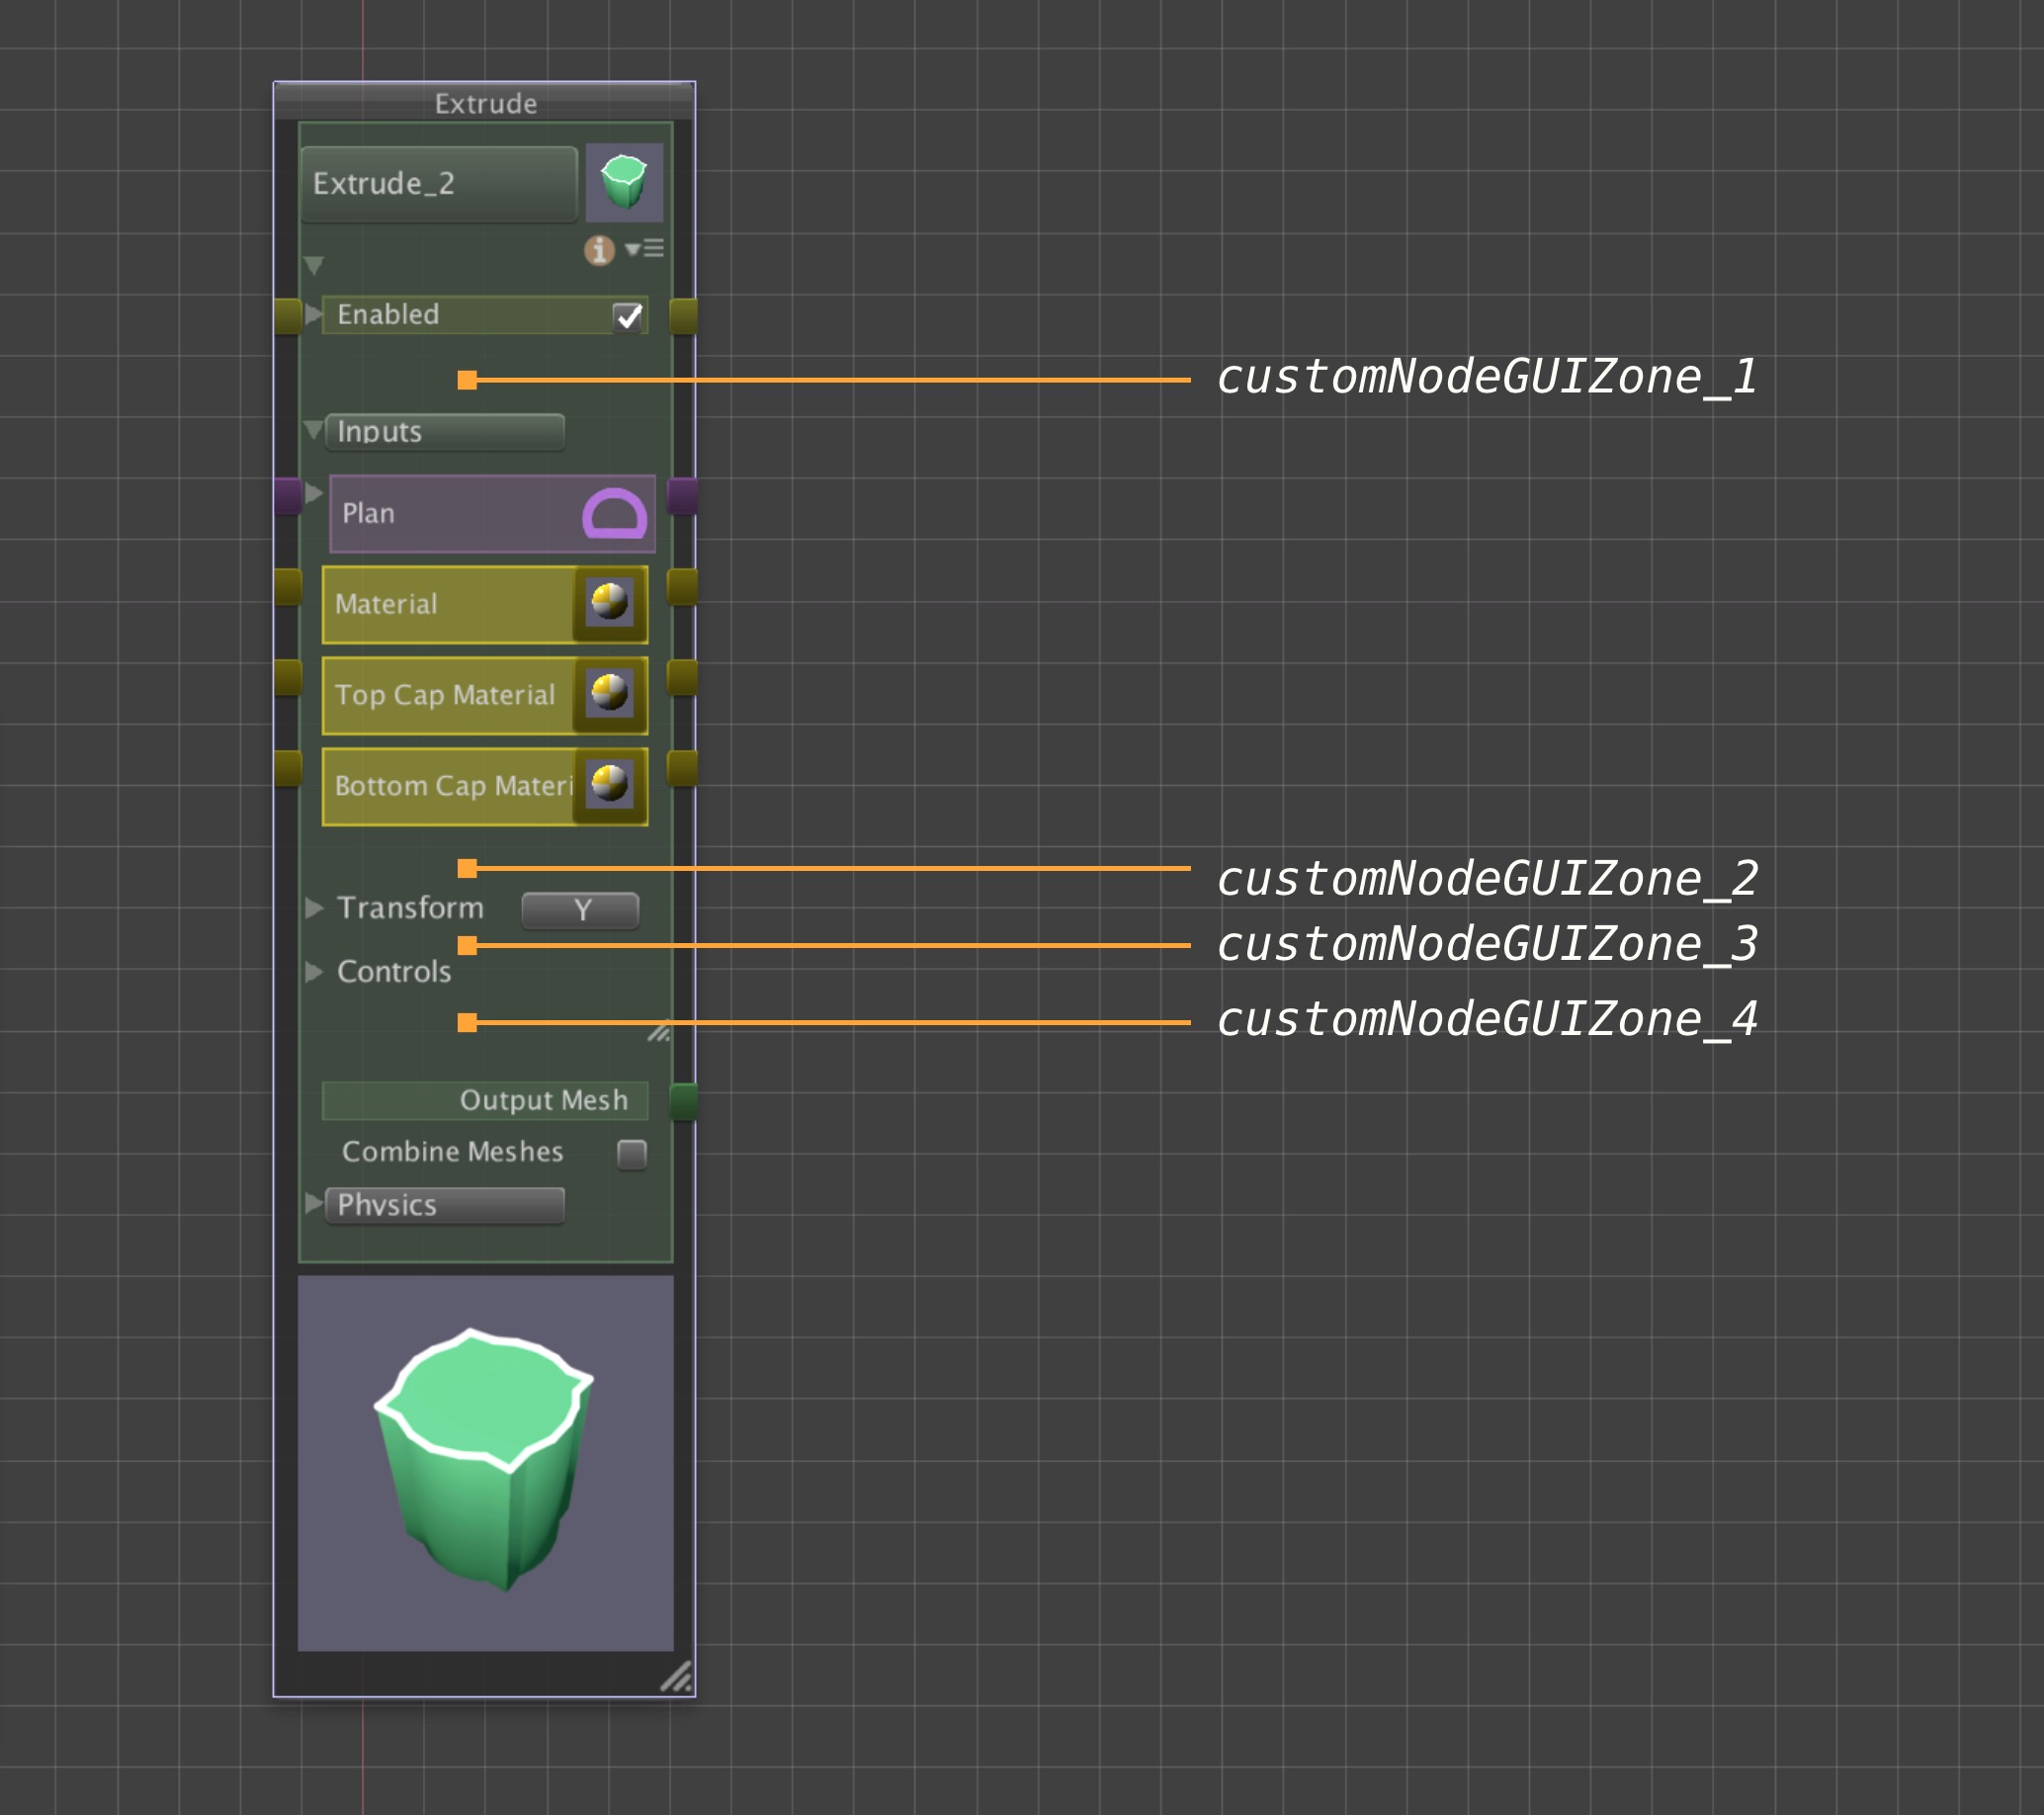 In addition to SceneView Handles, you can also create custom GUI to insert into the node palette. There are four zones in the node palette which are controlled by GeneratorHandler functions you can override. The four zones are depicted in the following diagram.
To add GUI elements to your custom node palette, override one of these four functions. The current y-value for the GUI zone is passed into the function. You must keep adding to this cur_y and return the final value for cur_y at the end of the function.
The function may initialize variables to help with layout of the EditorGUI elements.
public override int customNodeGUIZone_1(int cur_y, AXNodeGraphEditorWindow editor, AXParametricObject po)
 {
     int     gap         = ArchimatixUtils.gap;
     int     lineHgt     = ArchimatixUtils.lineHgt;
     float     winMargin     = ArchimatixUtils.indent;
     float     innerWidth     = po.rect.width - 2*winMargin;

     Rect pRect = new Rect(winMargin, cur_y, innerWidth, lineHgt);

     // Create GUI here


     return cur_y;
 }
Leave a Reply
You must be logged in to post a comment.