This page coming soon!

Month: August 2016
This page coming soon!
Introduction
Archimatix (AX) can prepare the models it creates for Unitiy’s Global Illumination (GI) , both realtime and baked. Since AX generates models frequently as parameters are modified, the system makes some assumptions about when in your workflow you are ready to have Unity render the metadata that supports GI.
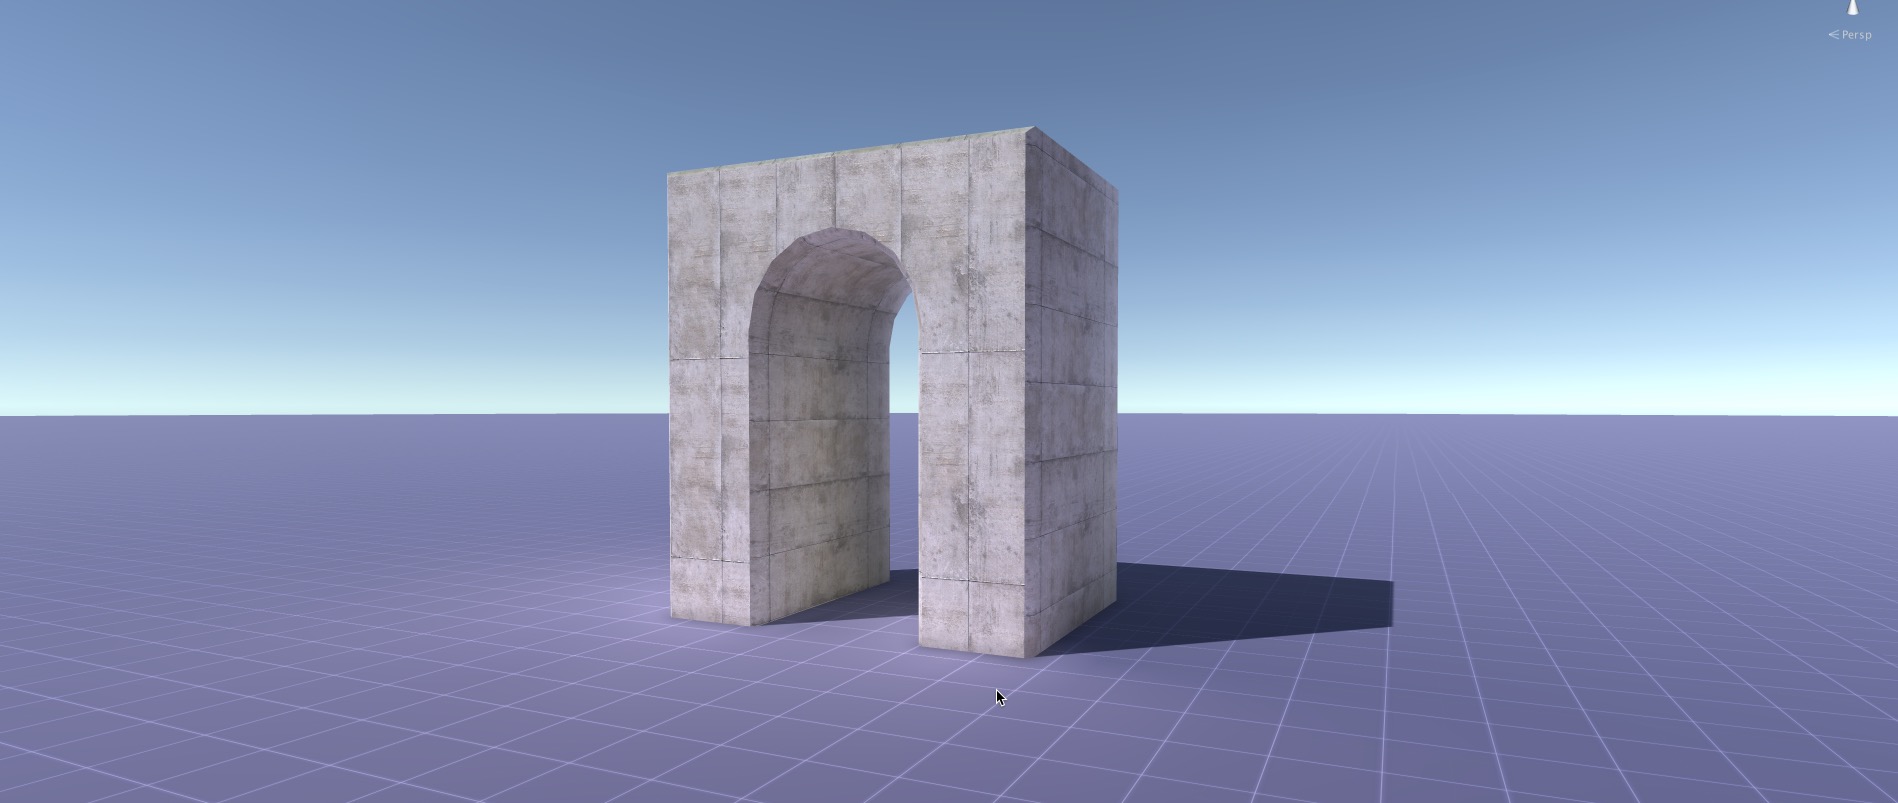
Arch with Global Illumination
General Workflow
Depending on the complexity of the model, pre-computation for Unity’s GI lighting can take a significant amount of time (to say the least!). By default, Unity tries to initiate this computation any time it senses that static meshes in the scene have been transformed, added or deleted. Although useful in many cases, this default mode of building the lighting model becomes burdensome when modeling with Archimatix, since, as you drag parameter AX handles in realtime, you are usually regenerating hundreds of meshes per second. Even after you stop dragging and AX generates actual GameObjects, you are likely to keep on modifying and tweaking parameters. While this fluid mesh generation is part of the magic of AX, such rapid changes set the automatic lightmap build into unnecessary overdrive. There are two ways to avoid this this situation.
 The first way to avoid unnecessary computation while modifying the parameters of a model is to simply turn the Auto build mode off. This is done by opening the Unity Lighting Window and unchecking the “Auto” checkbox, as show in the image to the right. With Auto off, you can modify AX meshes to your hearts content with out setting off the lighting computation. When you are ready to see the model rendered with GI, click the manual “Build” button to the right of the “Auto” checkbox.
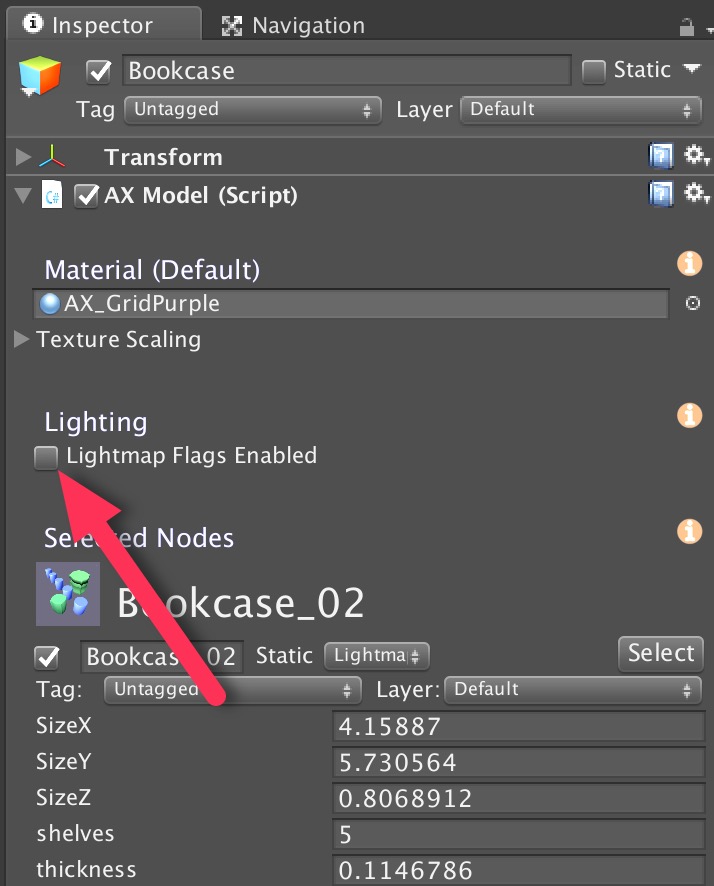 However, if you have a preference to leave “Auto” on, then you can temporarily disable Lightmap Static flags for your entire AX model by making sure the Lightmap Flags Enabled checkbox in the Inspector for the model is off. This means that, as AX generates GameObjects with meshes, it does not add the Lightmap Static flag to the the GameObjects and the light mapper will not be aware of the changes to the mesh. With this approach, you can model as much as you like, and then when ready to see it rendered with GI, you can click the Lightmap Flags Enabled checkbox.
Note: The Lightmap Flags Enabled parameter for the model is off by default. This means that, when you first create an AX model, you must check this to on before building the lighting.
Once you have finished a session of modeling and tweaking, and you are ready to take a coffee break, you can click the “Lightmap Flags Enabled” checkbox in the Inspector for the model. If “Auto” is on, the light mapping will shift into high gear. Otherwise, after checking Lightmap Flags Enabled go to the Lighting window and click on the Build button.
In either mode, when the lighting model is being built, it will only take into consideration the objects that have been generated by nodes that have been designated as Lightmap Static, as we shall see next.
Lightmap Static Flags
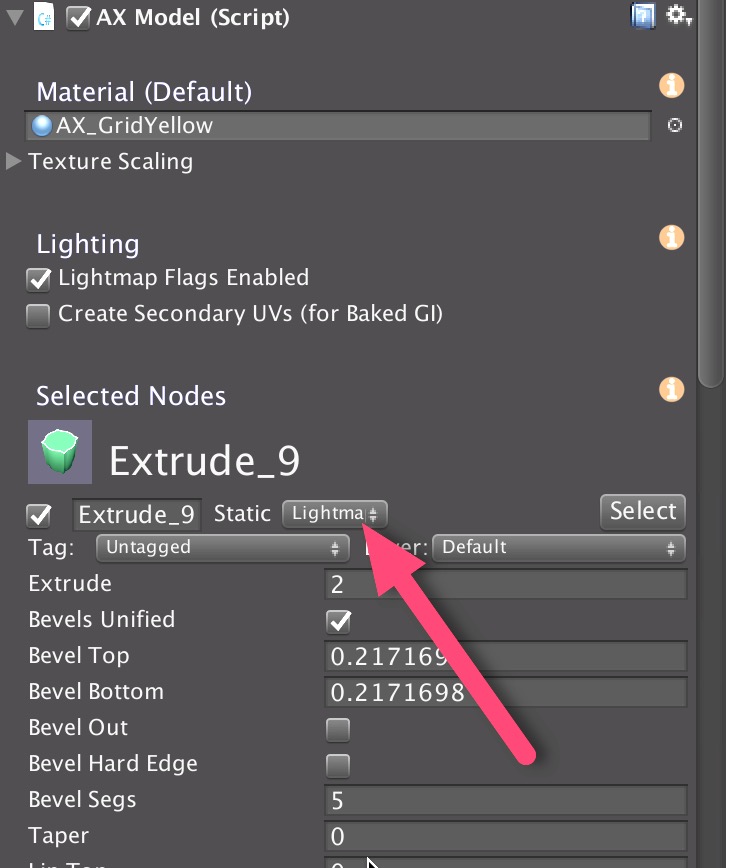 If a AX ParametricObject, such as the Extrude_9 in the figure to the right, is set to LightmapStatic (red arrow), then when a GameObject gets generated AX, its static flag will be set to Lightmap Static (so long as the Lightmap Flags Enabled is checked when the model is built), and the Unity GI system will treat it as such when rebuilding. This static flags setting is analogous to the flag options for any GameObject in Unity, with the difference being that the flag is set internally in the AX node and transferred to GameObjects when they are built by AX.
When you set the static flag for a node, all its upstream nodes will be set to the same flags.
Secondary UVs for Baking
If you have selected Baked GI in the Unity Lighting Window, then you will want to have SecondaryUV’s generated for the meshes created by Archimatix. Since generating these extra UVs, which are used by the Unity lighting model to created rendered lightmaps, takes some extra computation, you must recreate the secondary UVs each time you bake the lighting.
The checkbox called Create Secondary UV’s appears only after the Lightma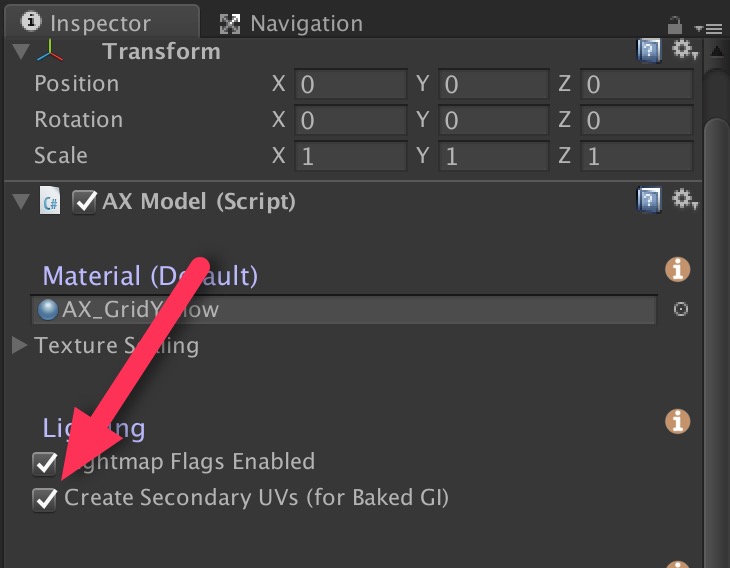 p Flags Enabled checkbox has been checked. When you check it, the Secondary’s will be generated for any meshes generated by nodes that have had their flags set to Lightmap Static..
Even if you check the Create Secondary UV’s, this box will become unchecked after the AX model has finished one of its frequent builds.
Parametric shapes are the heart of Archimatix modeling. Much of the form generation in real architecture is defined by shapes that are then extruded, swept and repeated. In this sense, architectural forms are a departure from sculptural forms such as organic bodies, automotive forms or geological formations which are more topological in nature and best model with 3D booleans and sculpting tools found in Maya and ZBrush. Much of architecture, on the other hand, can be described digitally using plan shapes and section shapes. In Archimatix, plans and sections are usually parametric shapes.
A parametric shape is a 2D form that is generated by a certain geometric logic and sized by input parameters. A simple but common example of a parametric shape is a circle, which is defined simply by a single parameter, the radius. The full description of a circle at runtime in Unity is a set of vertices that are in its circumference. Depending on the detail level, there may be dozens of vertices. But for the person using a circle for modeling, the radius parameter is a convenient way to think more abstractly about the shape.
More examples of parametric shapes, such as the ArchShape can be found in the Archimatix 2D Library. Many of the parametric shapes that ship with archimatix are listed in the sidebar to the right.
To create your own parametric shapes, you can start with an empty Shape node and code your own logic for the geometry using parameters you define yourself.
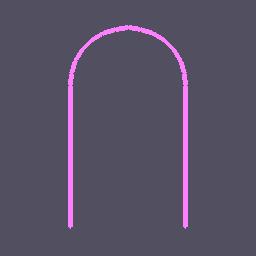 The ArchShape is a useful parametric shape for making doorways and windows. It is open by default to allow easy use as a plan for a molding sweep using PlanSweep. If you close it, you can use it as a subtraction shape in a ShapeMerger to cut a window opening out of a wall or feed it into a Repeater2D to cut an array of window holes.
Parameters
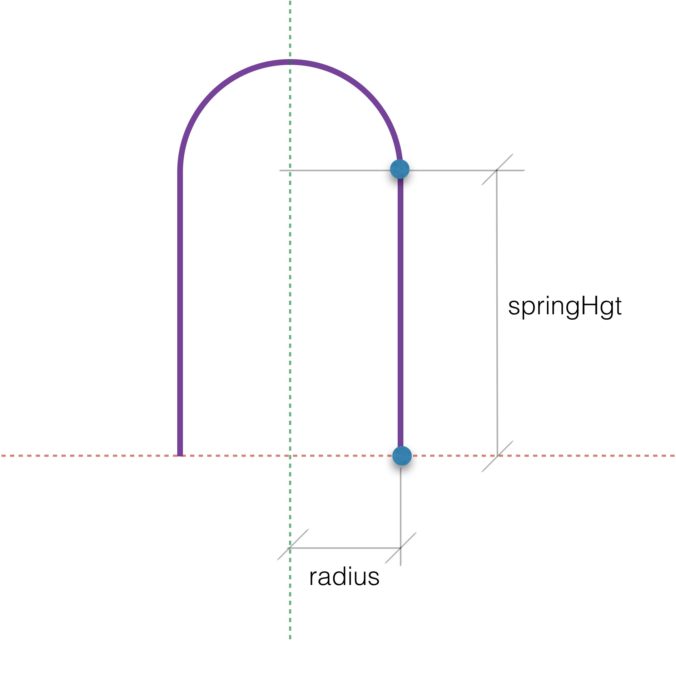
radius
adius or the arc. This parameter also controls the width of the arch.
springHgt
The vertical height of the point from which the arch springs.
segs
The number of segments to complete the 180 degree arc of the arch.
Examples
ArchMolding01
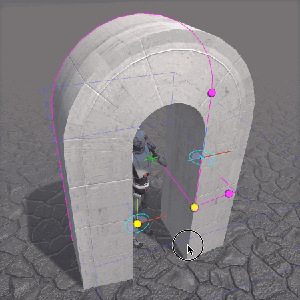
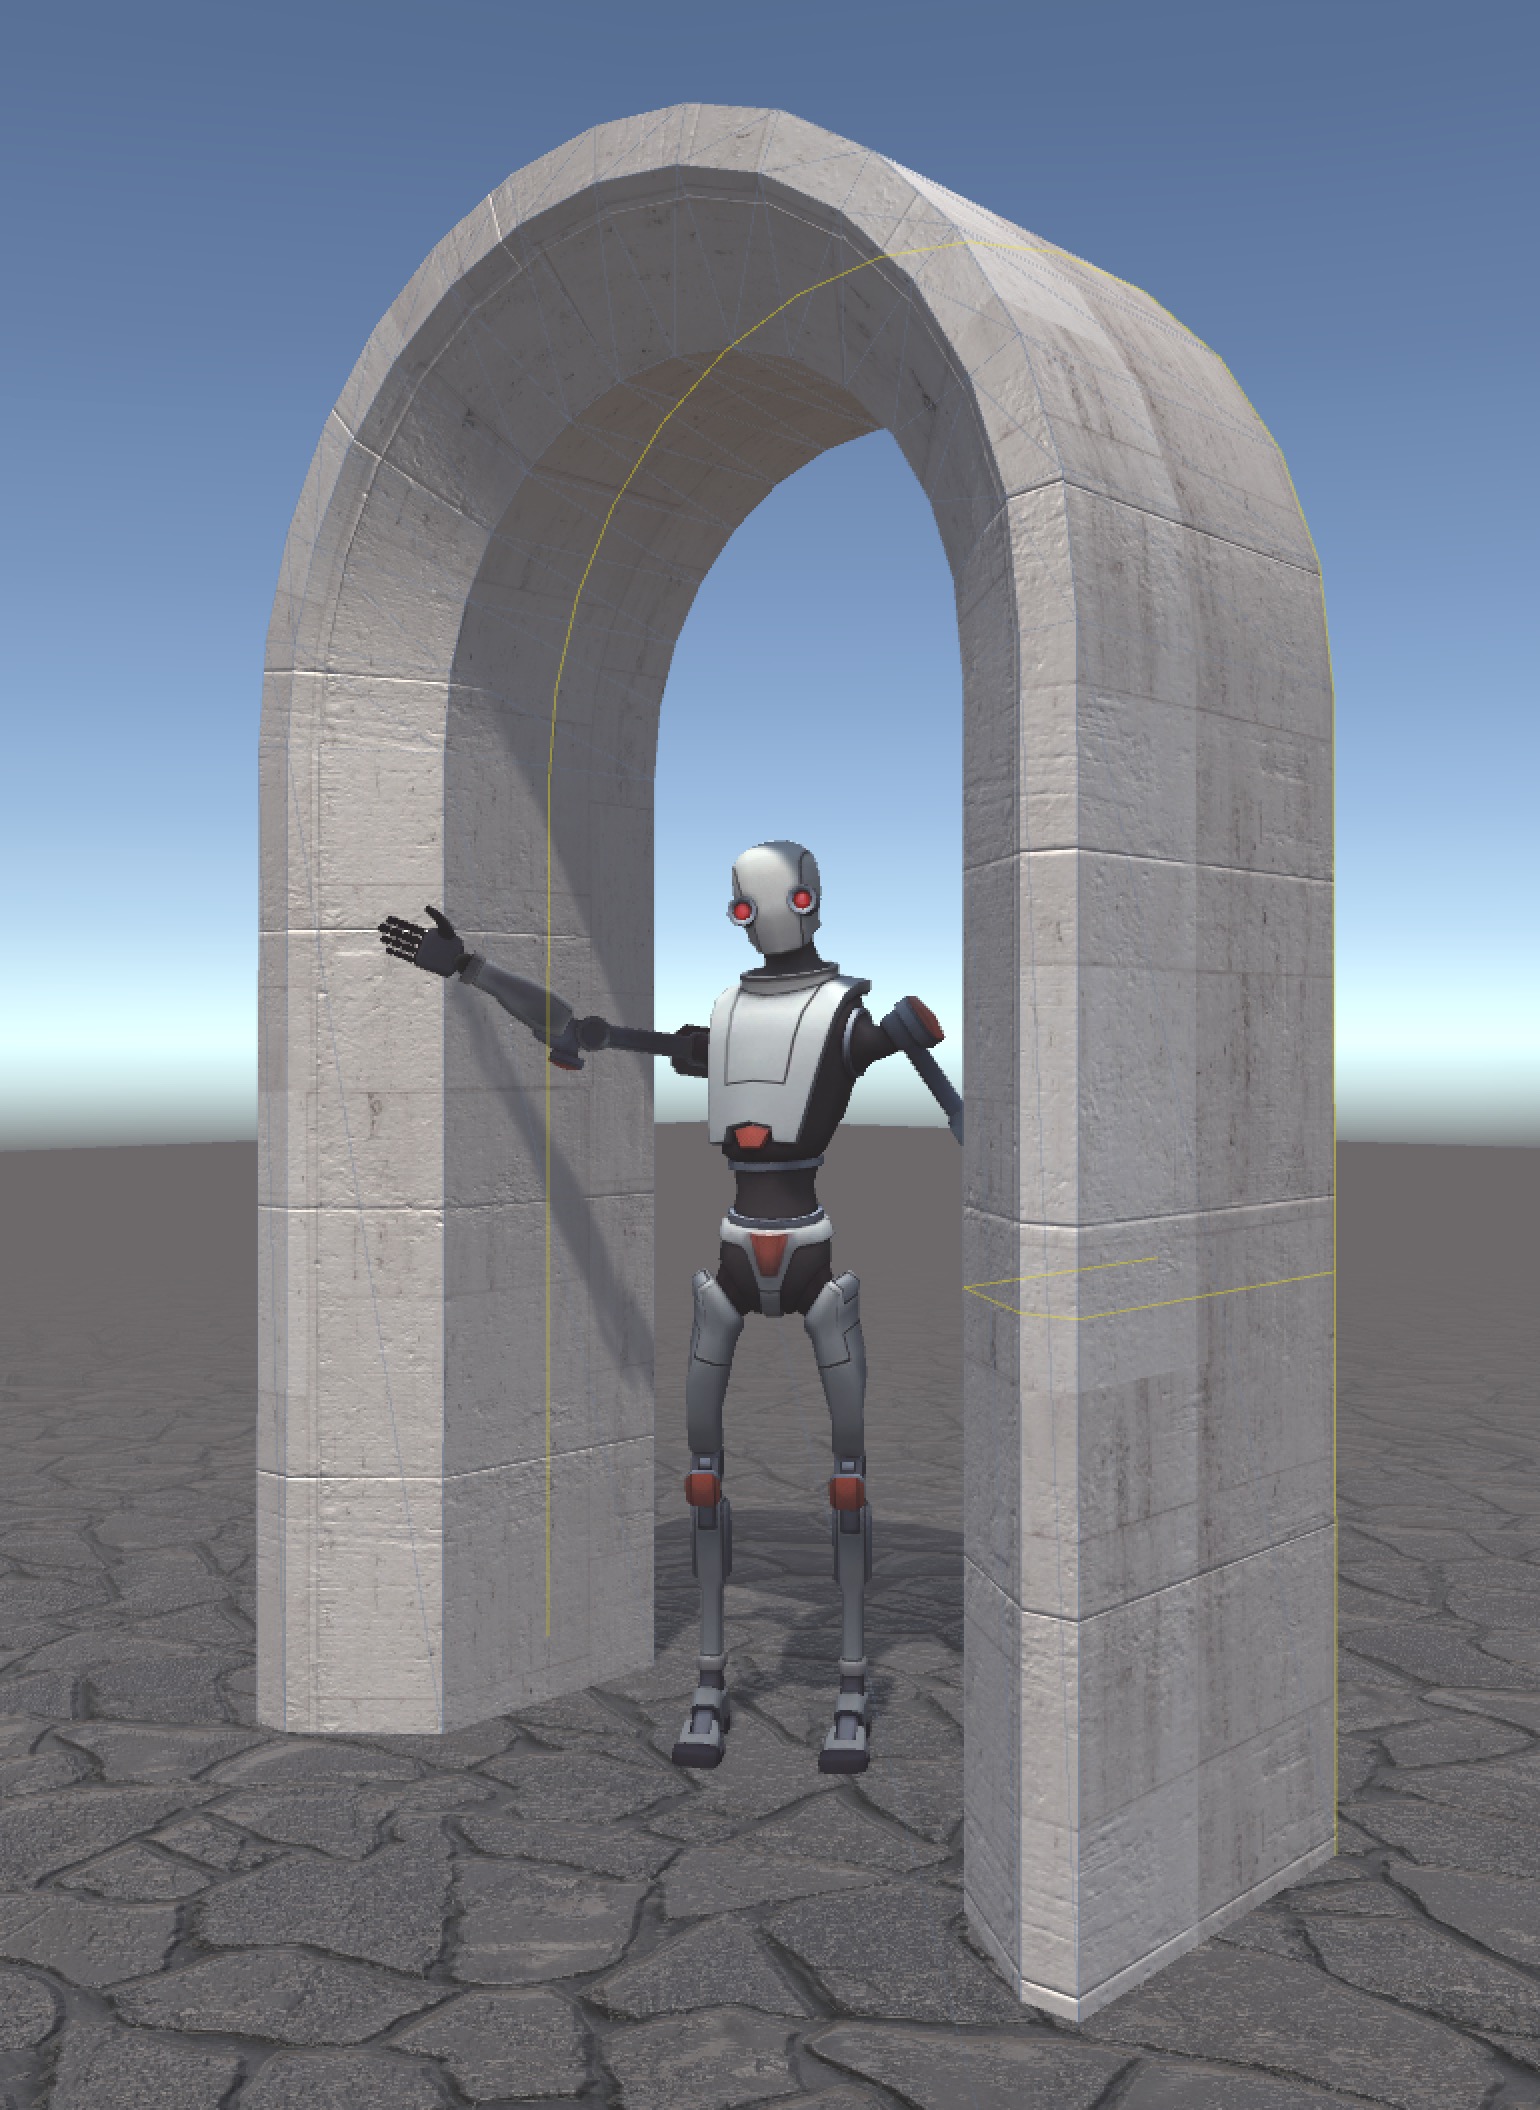
Robot Kyle demonstrates the ArchMolding01, the result of a simple PlanSweep.
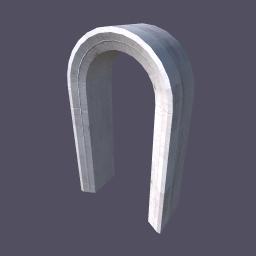
This simple arch is made from two shape nodes and a PlanSweep node. The first shape node is the plan shape, which is a simple ArchShape. The Section shape is a parametric shape described by four parameters.
The form of the arch may be modified by adjusting the handles for the plan and section shapes in the SceneView.
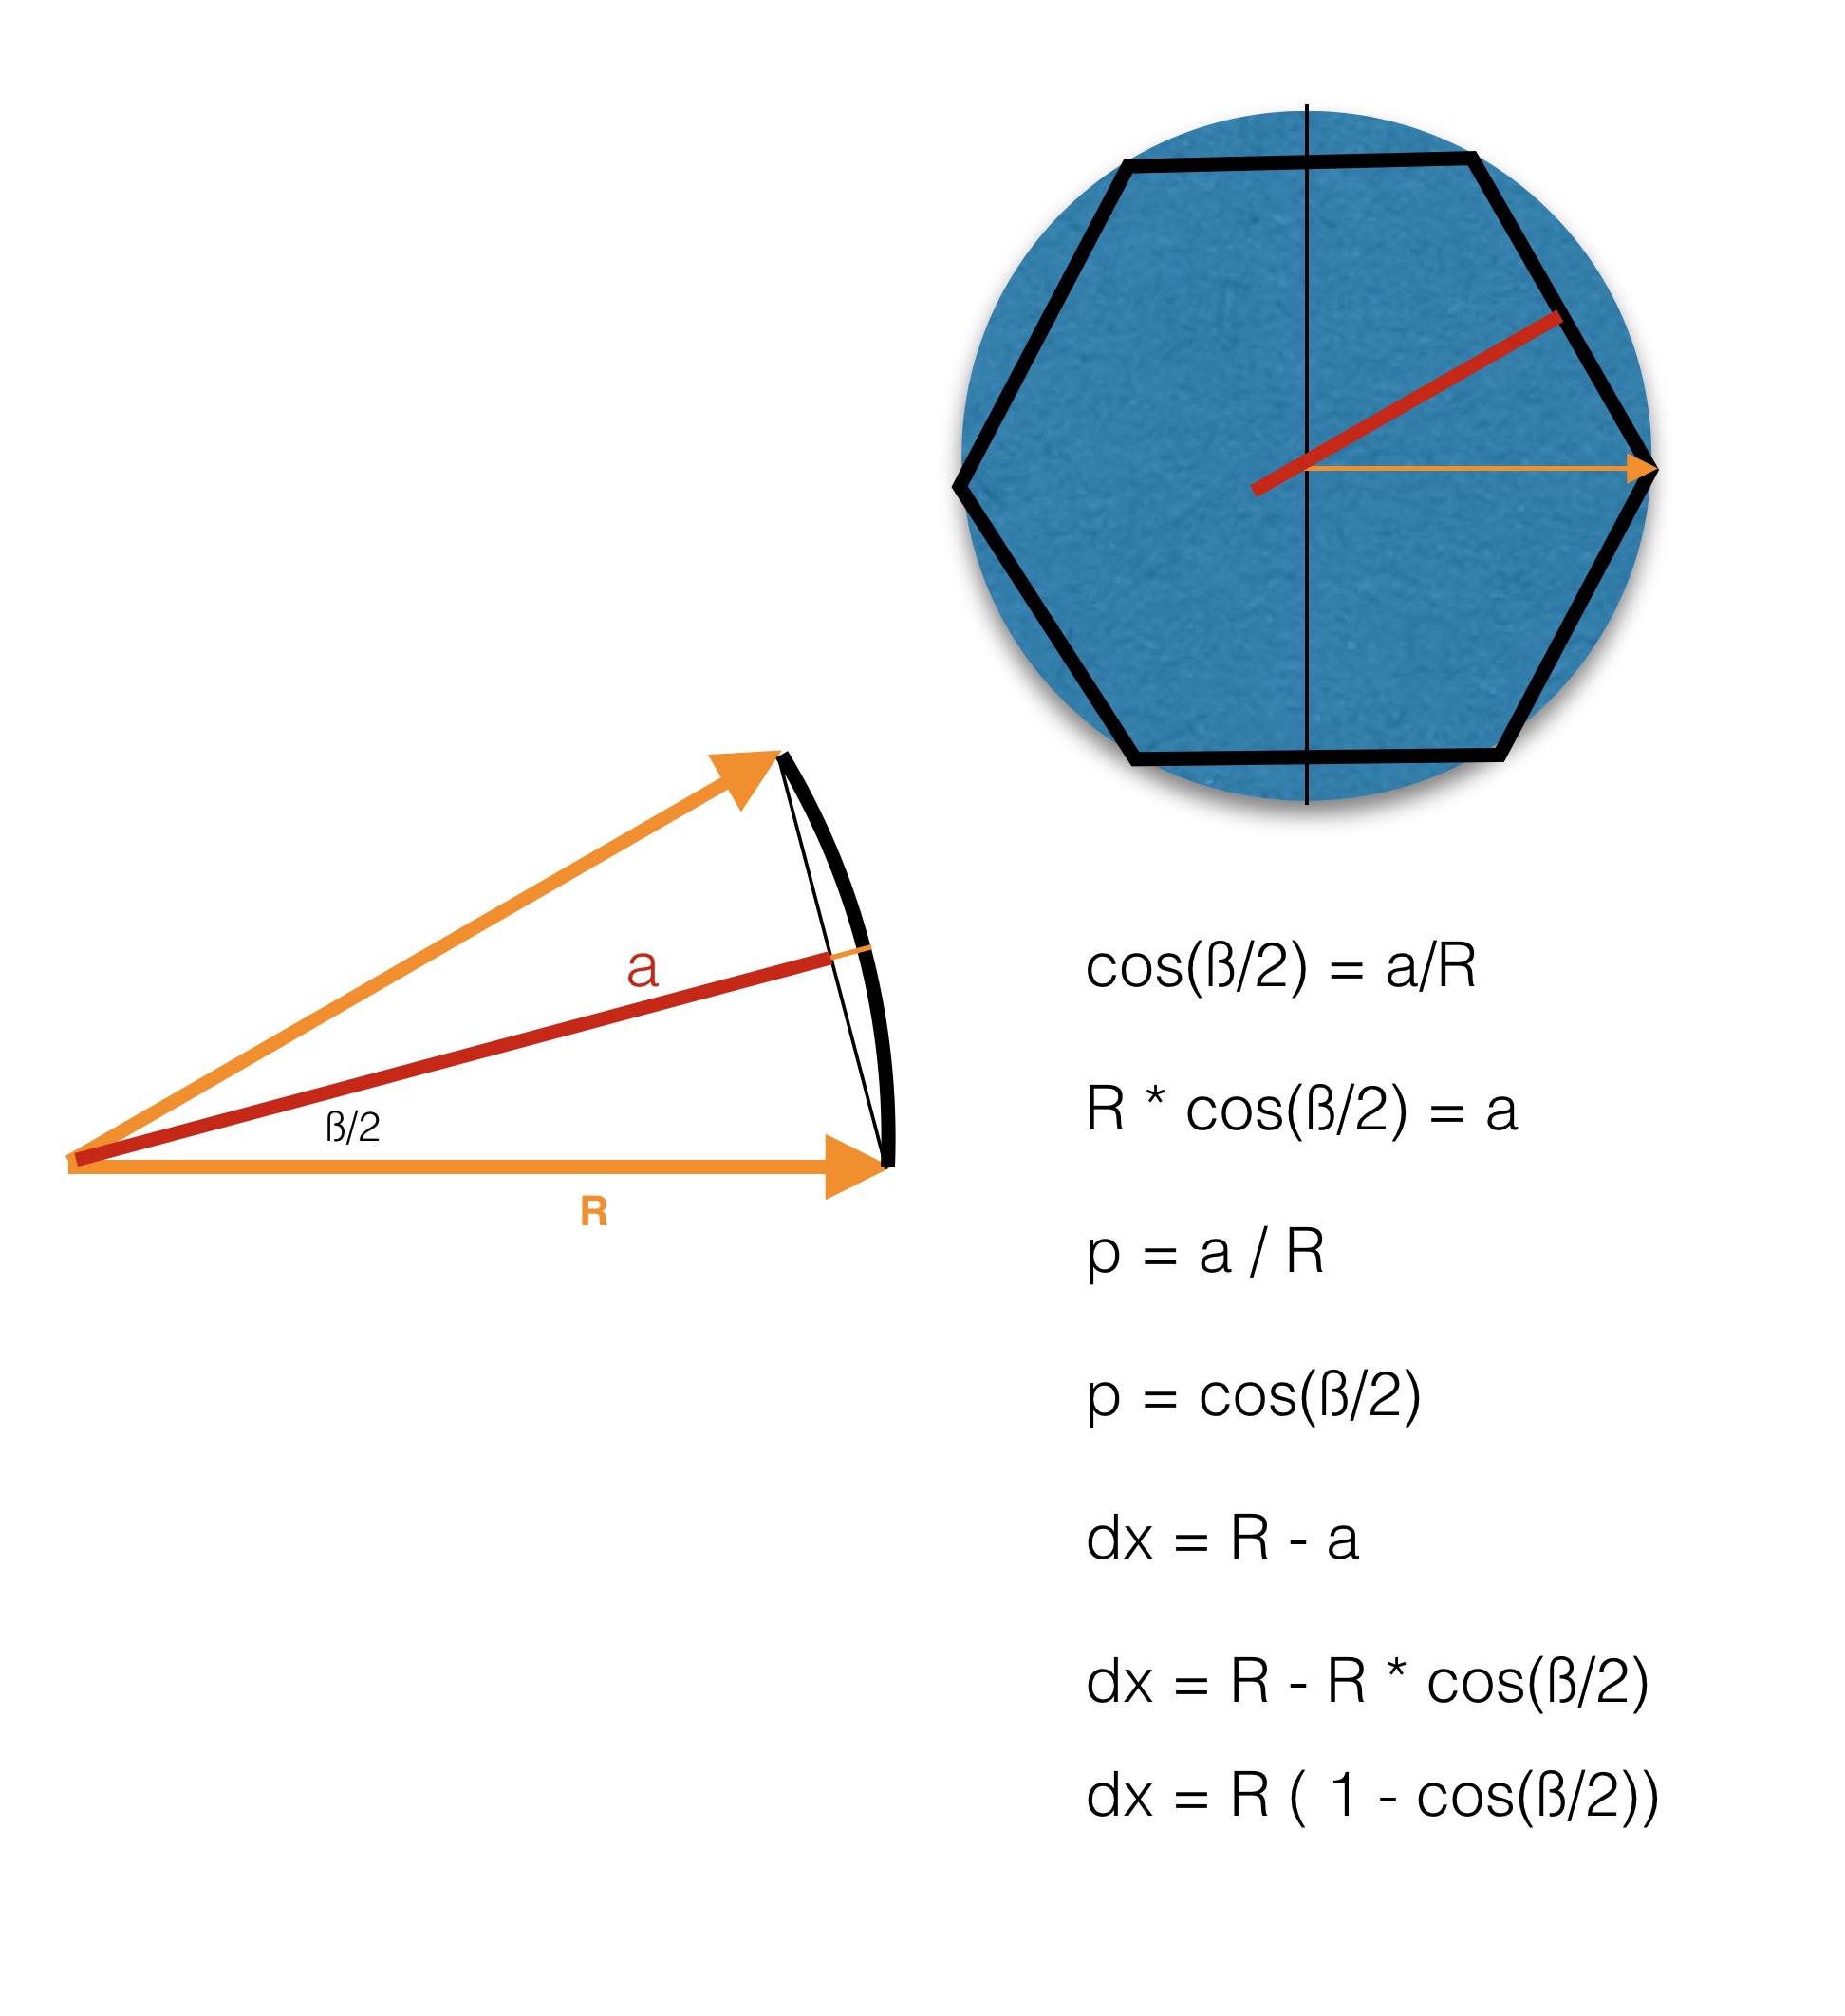 PlanSweeper is unique as a spline extruder in that it favors the straight-aways rather than the corners. This makes all the straight segments the same corrections while the bevel sections vary. While this works well for cornices, etc., it is problematic in the Lathe where, as you reduce the number of segments, the section is essentially shifted in toward the center, eventually overlapping the pivot.
To compensate for this, we can shift the section to the right just before sweeping along the circular plan so that it is at the radius defined by the corner vertices. In the figure to the right, dx, the amount of the compensating shift, is calculated.
Sky Fortress
Theme by Anders Noren — Up ↑
Recent Comments