FreeCurve
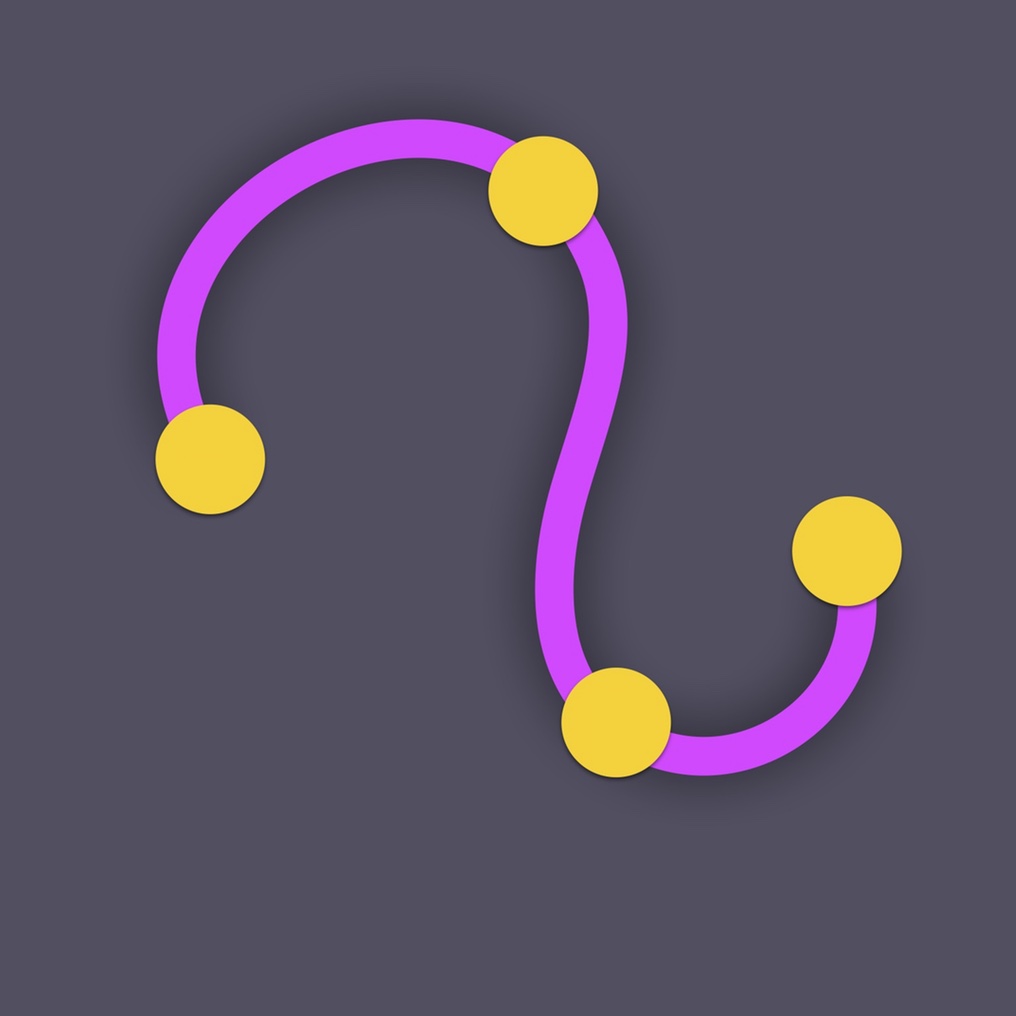 The FreeCurve node creates a 2D Shape that is not parametric, per se, but that provides freeform handles to edit individual control points. The control points are sharp by default, but they can be turned into Bezier handles as well.
FreeCurve is particularly powerful for creating organic meshes when serving as the source of PlanSweeps and PlanDeformers.
Starting to Edit a FreeCurve
Click on the FreeCurve icon in the sidebar node menu. The node will appear in the node graph and automatically take you into AddPoint mode. Move your mouse cursor to the SceneView and you will notice that crosshairs appear on the XZ plane where ever you move your mouse. At this point you can begin clicking to create your shape.
In general, it is best to draw in a counter-clockwise direction, since this is a convention for Archimatix Shapes (though you can always reverse a shape later).
To stop drawing the curve, either click on the first point again, if you are making a closed shape, or click anywhere off the SceneView window.
Moving Points
You can click on any point and drag to move it in the XZ plane.
Deleting Points
If you select a point (or multi-select with Shift-click), you can hit the Backspace key to delete the point.
Adding Points
You can click on any a blue midpoint and drag to add a new point at that location and immediately start moving it in the XZ plane.
Bezier Points
To convert a point to a Bezier point with tangent handles, you can alt-click (option-click) the point and then click it again and drag to pull out its handles. In the future you will able to break the handles and also have the option to turn it into a Catmull point.
Recent Comments